> ## Documentation Index
> Fetch the complete documentation index at: https://docs.state.space/llms.txt
> Use this file to discover all available pages before exploring further.
# Quickstart
 ***
**What to expect:**
Install the State Space CLI\
Upload your first smart contract\
Validate your project appears in the State Space Workbench UI
Create an [account](https://app.state.space/sign-up).
### Install the State Space CLI:
```bash theme={null}
brew install state-space/state-space/cli
```
### Optional: Use an example ERC20 from our examples Github repo
As an example, we'll use an unmodified ERC20 project from OpenZeppelin.
Clone the repo based on your framework preference.
If you are using your own project, make sure your code successfully compiles.
```bash Foundry theme={null}
git clone https://github.com/state-space/public-examples/OpenZeppelinERC20_Foundry.git
```
```bash Hardhat theme={null}
git clone https://github.com/state-space/public-examples/OpenZeppelinERC20_Hardhat.git
```
***
### Initialize project
Run the `init` command from the main folder of your Foundry or Hardhat project to create the `state-space.toml` config file.
```bash theme={null}
state-space init
```
It should look like this:
```toml state-space.toml [expandable] theme={null}
# Sets the name of the project.
#
# The project is created if it does not already exist.
project = "Project MyToken"
# If using State Space in a team, specify the team identifier.
# By default, your personal account will be used.
team = "my-team"
# Sets the primary framework to use.
#
# When setting a framework, contract sources and solc settings are
# automatically used when pushing code to State Space.
#
# Optional. Supports "foundry" or "hardhat".
framework = "hardhat"
# Creates a new Workbench project
workbench.new = "MyToken"
# Specify paths to solc json output files.
# If using a framework, this usually isn't necessary.
# artifacts = []
# Defines a deployment
#
# Deployments are a set of concrete transactions and accounts.
# They are used as initial states when exploring your state space.
#
# Deployments are recorded by running a script against a local EVM.
# Deployments are currently only supported when using a framework.
# [deployment.Main]
# Command is a list of strings representing the command to run when
# recording this deployment. Ensure that your RPC endpoint points to
# localhost:8545.
# command = ["forge", "script", ...]
# When using Foundry scripts, the scripts property may be used as a
# shorthand alternative to the command property.
# The RPC url does not need to be specified when using this form.
# scripts = [
# "name of or path to Foundry script",
# ]
# When using Hardhat's Ignition, the modules property may be used as a
# shorthand alternative to the command property.
# The RPC url does not need to be specified when using this form.
# modules = [
# "path to Ignition module",
# ]
# Specify the number of externally owned accounts (wallets) to use
# in this deployment
# accounts = 3
```
### Configure settings
Update the following settings in `state-space.toml` with your project details:
```toml Foundry theme={null}
# state-space.toml
project="MyToken"
framework="foundry"
workbench.new="MyToken"
```
```toml Hardhat theme={null}
# state-space.toml
project="MyToken"
framework="hardhat"
workbench.new="MyToken"
```
See the [CLI settings guide](/docs/cli/settings) for more details.
### Deploy to State Space
Deploy your project to state space by running the `push` command:
```bash theme={null}
# execute command in terminal
state-space push
```
Make sure your code successfully compiles before running the `push` command.
You will be provided a link to login using the same credentials you created in Step 1.
After you authenticate, the CLI will compile and deploy your code to State Space. Depending on the size of your codebase, they may take a few minutes.
Please [contact us](mail:contact@state.space) if you experience any issues.
***
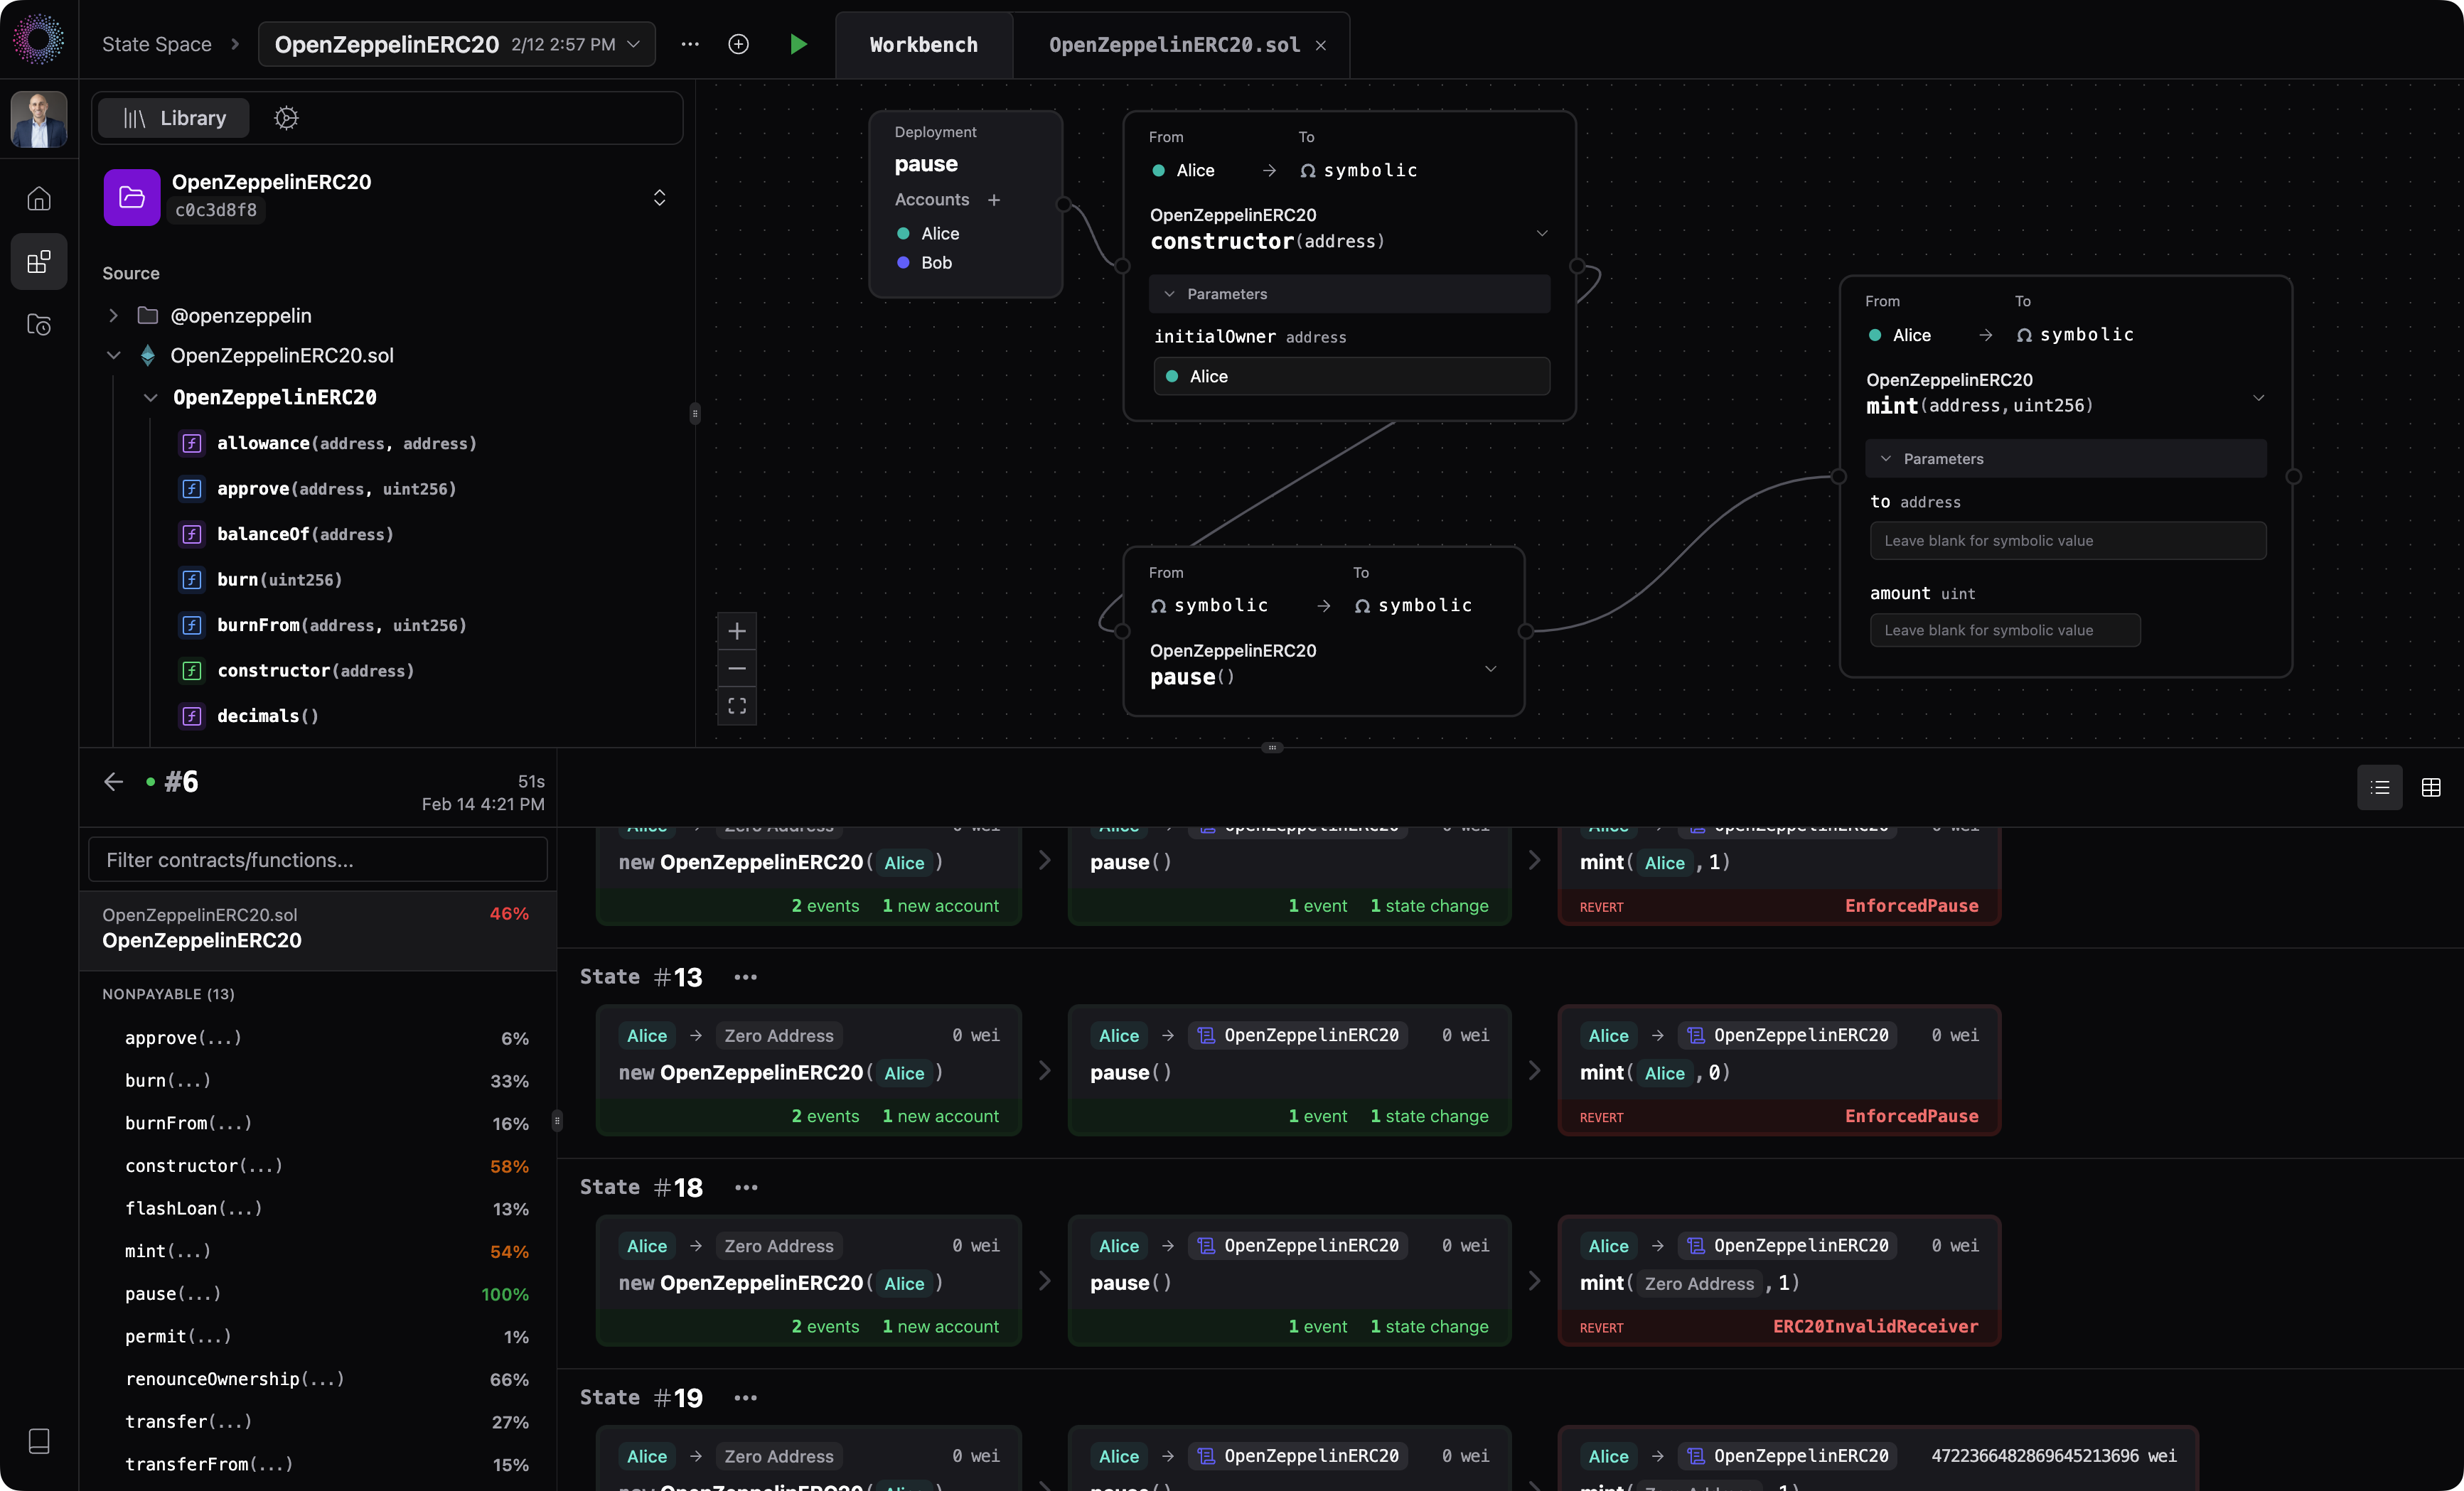
Login to [State Space Workbench](https://state.space/me) and open your newly created Workbench project from the Home dashboard.
Expand the folder tree, and begin designing a test scenario by dragging a deployment to the canvas, and a sequence of transactions (function calls) to the canvas.
For a more in-depth walkthrough, try one of our tutorials:
* [ERC20: Pause->Mint](/docs/tutorials/erc20-pause-mint)
* [ERC20: End-to-End Testing of transferFrom](/docs/tutorials/erc20-transferfrom)
***
**What to expect:**
Install the State Space CLI\
Upload your first smart contract\
Validate your project appears in the State Space Workbench UI
Create an [account](https://app.state.space/sign-up).
### Install the State Space CLI:
```bash theme={null}
brew install state-space/state-space/cli
```
### Optional: Use an example ERC20 from our examples Github repo
As an example, we'll use an unmodified ERC20 project from OpenZeppelin.
Clone the repo based on your framework preference.
If you are using your own project, make sure your code successfully compiles.
```bash Foundry theme={null}
git clone https://github.com/state-space/public-examples/OpenZeppelinERC20_Foundry.git
```
```bash Hardhat theme={null}
git clone https://github.com/state-space/public-examples/OpenZeppelinERC20_Hardhat.git
```
***
### Initialize project
Run the `init` command from the main folder of your Foundry or Hardhat project to create the `state-space.toml` config file.
```bash theme={null}
state-space init
```
It should look like this:
```toml state-space.toml [expandable] theme={null}
# Sets the name of the project.
#
# The project is created if it does not already exist.
project = "Project MyToken"
# If using State Space in a team, specify the team identifier.
# By default, your personal account will be used.
team = "my-team"
# Sets the primary framework to use.
#
# When setting a framework, contract sources and solc settings are
# automatically used when pushing code to State Space.
#
# Optional. Supports "foundry" or "hardhat".
framework = "hardhat"
# Creates a new Workbench project
workbench.new = "MyToken"
# Specify paths to solc json output files.
# If using a framework, this usually isn't necessary.
# artifacts = []
# Defines a deployment
#
# Deployments are a set of concrete transactions and accounts.
# They are used as initial states when exploring your state space.
#
# Deployments are recorded by running a script against a local EVM.
# Deployments are currently only supported when using a framework.
# [deployment.Main]
# Command is a list of strings representing the command to run when
# recording this deployment. Ensure that your RPC endpoint points to
# localhost:8545.
# command = ["forge", "script", ...]
# When using Foundry scripts, the scripts property may be used as a
# shorthand alternative to the command property.
# The RPC url does not need to be specified when using this form.
# scripts = [
# "name of or path to Foundry script",
# ]
# When using Hardhat's Ignition, the modules property may be used as a
# shorthand alternative to the command property.
# The RPC url does not need to be specified when using this form.
# modules = [
# "path to Ignition module",
# ]
# Specify the number of externally owned accounts (wallets) to use
# in this deployment
# accounts = 3
```
### Configure settings
Update the following settings in `state-space.toml` with your project details:
```toml Foundry theme={null}
# state-space.toml
project="MyToken"
framework="foundry"
workbench.new="MyToken"
```
```toml Hardhat theme={null}
# state-space.toml
project="MyToken"
framework="hardhat"
workbench.new="MyToken"
```
See the [CLI settings guide](/docs/cli/settings) for more details.
### Deploy to State Space
Deploy your project to state space by running the `push` command:
```bash theme={null}
# execute command in terminal
state-space push
```
Make sure your code successfully compiles before running the `push` command.
You will be provided a link to login using the same credentials you created in Step 1.
After you authenticate, the CLI will compile and deploy your code to State Space. Depending on the size of your codebase, they may take a few minutes.
Please [contact us](mail:contact@state.space) if you experience any issues.
***
Login to [State Space Workbench](https://state.space/me) and open your newly created Workbench project from the Home dashboard.
Expand the folder tree, and begin designing a test scenario by dragging a deployment to the canvas, and a sequence of transactions (function calls) to the canvas.
For a more in-depth walkthrough, try one of our tutorials:
* [ERC20: Pause->Mint](/docs/tutorials/erc20-pause-mint)
* [ERC20: End-to-End Testing of transferFrom](/docs/tutorials/erc20-transferfrom)