Objectives: Install the CLI and setup environment
Successfully upload your first smart contract to Workbench.
Visually design an end-to-end test scenario.
Generate the state space and a test suite.
Analyze and validate contract behavior.
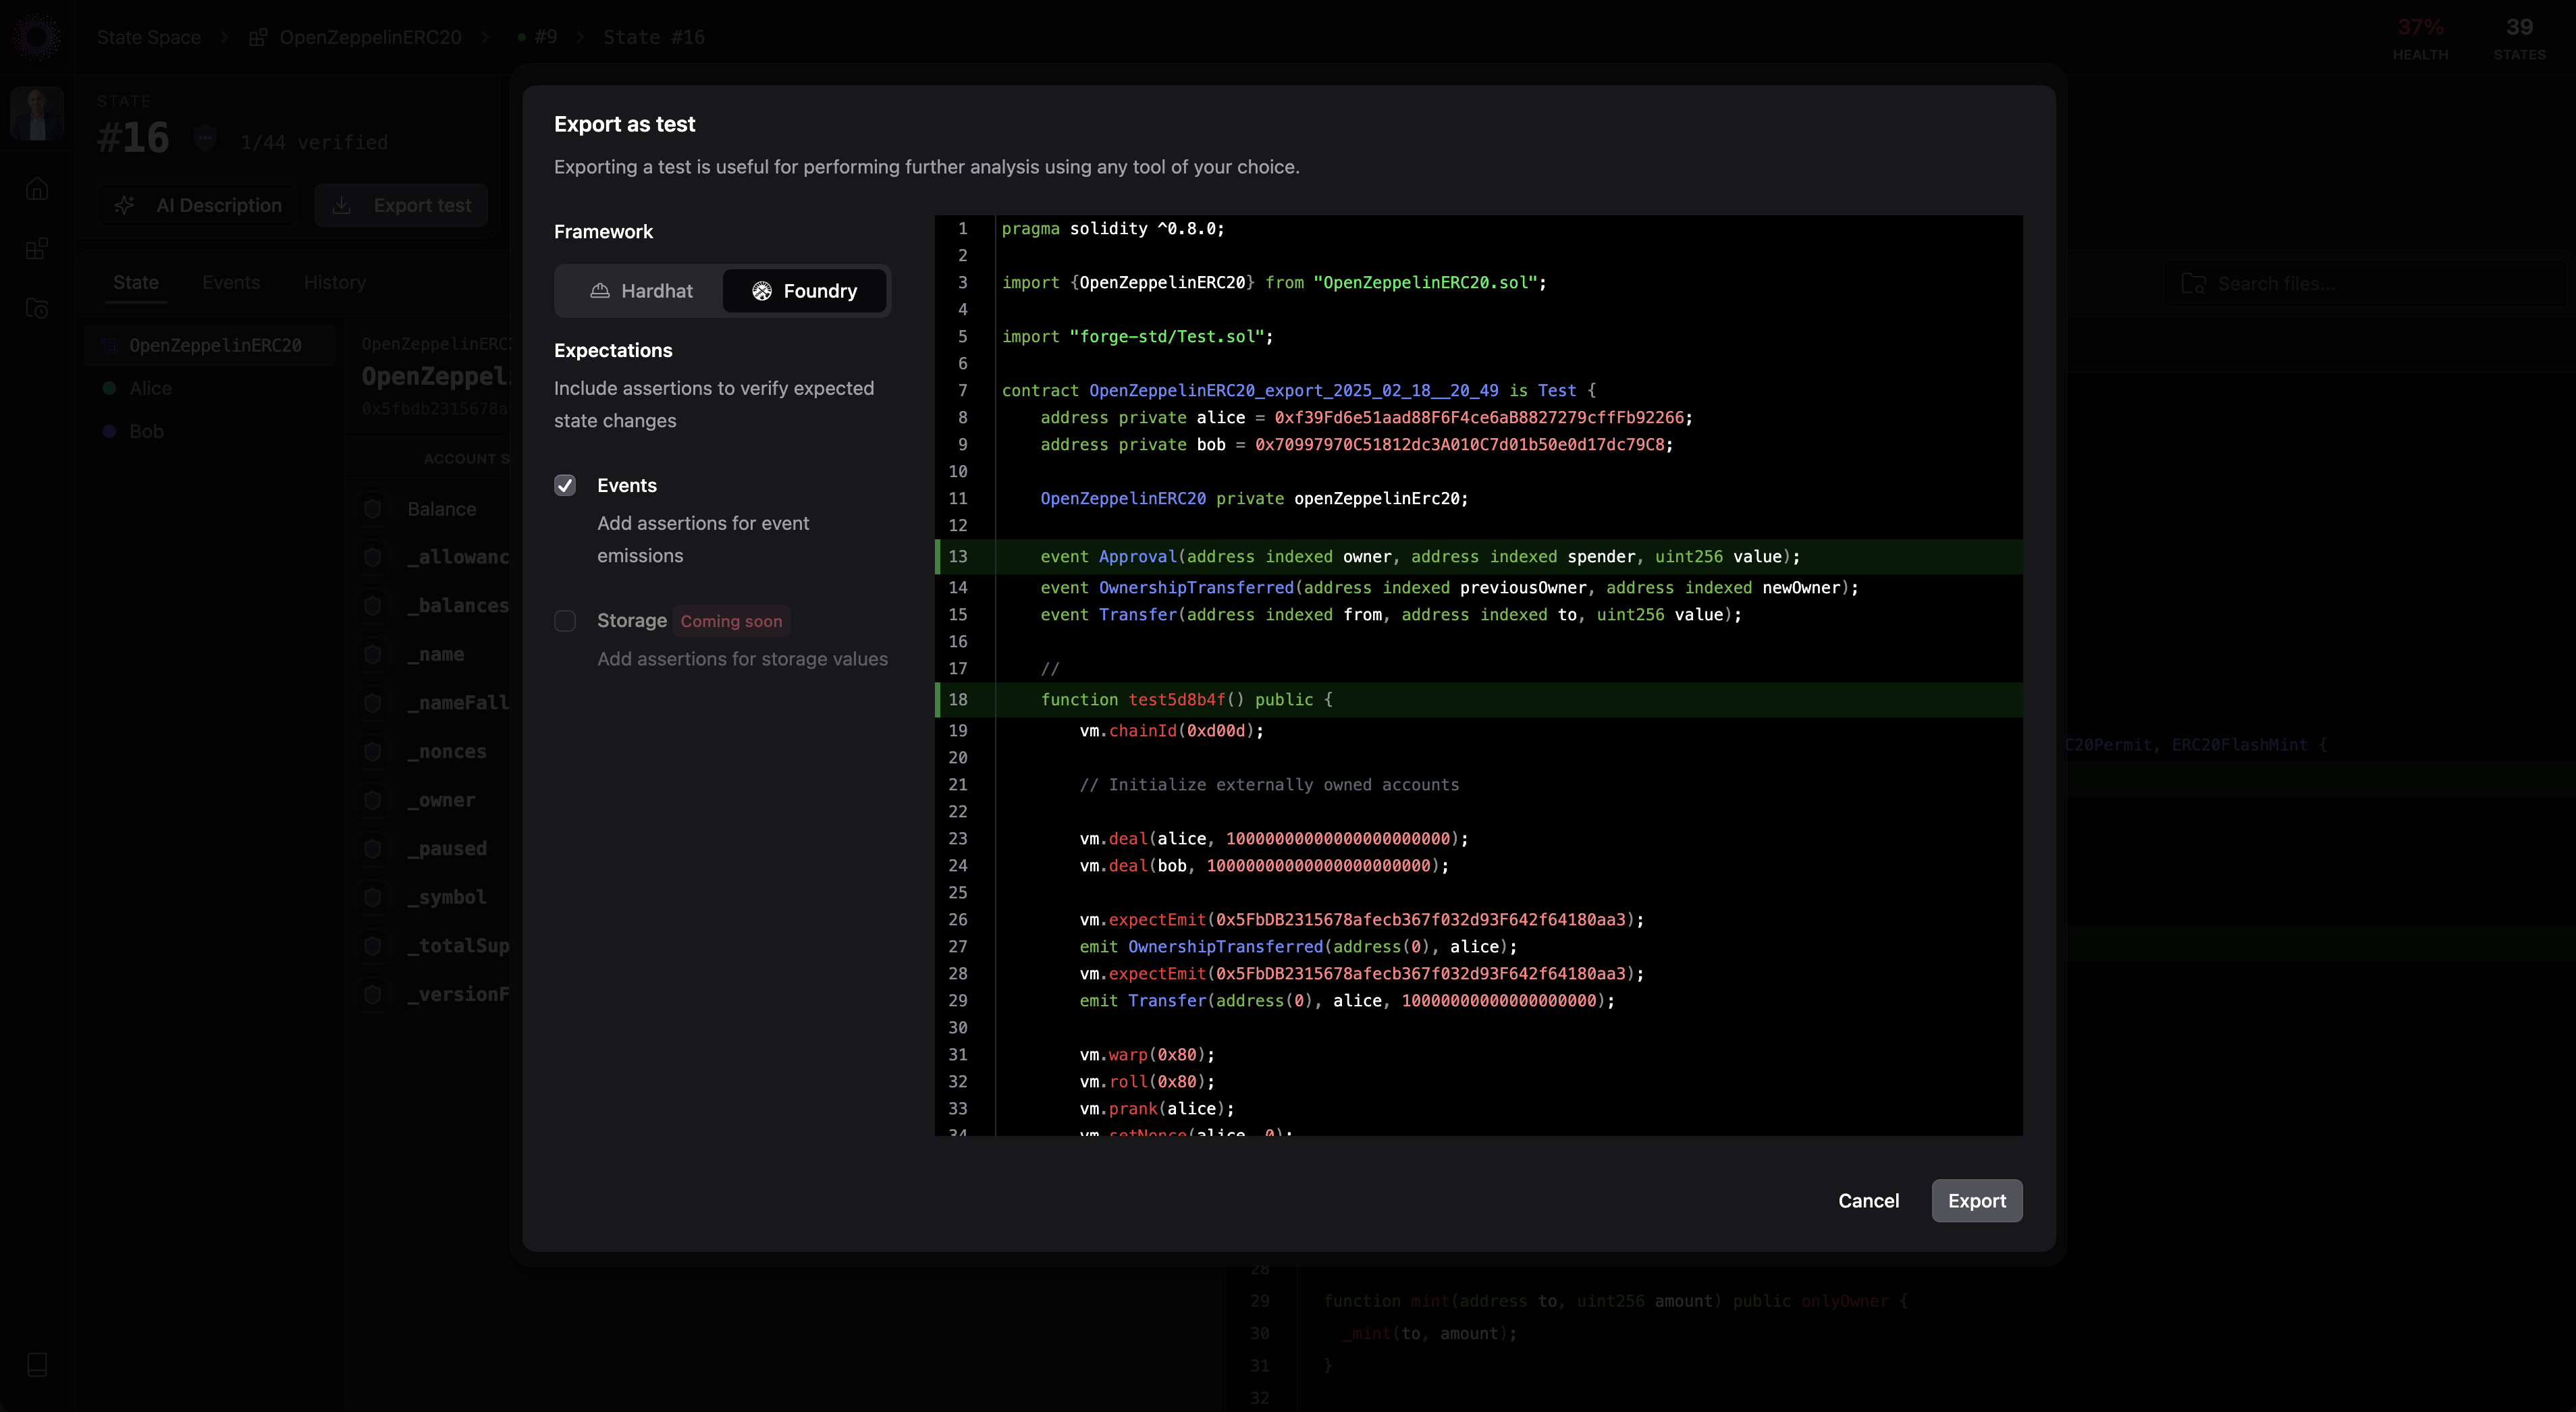
Export a test case to Hardhat and Foundry.
Configure and Deploy
Initialize project
Run theinit command from the main folder of your Foundry or Hardhat project to create the state-space.toml config file.state-space.toml
Update configuration
Add theworkbench.new property to automatically create a Workbench project upon submission. Your settings should like this:Deploy to State Space
View in Workbench
Use the browser to login to State Space, and select the
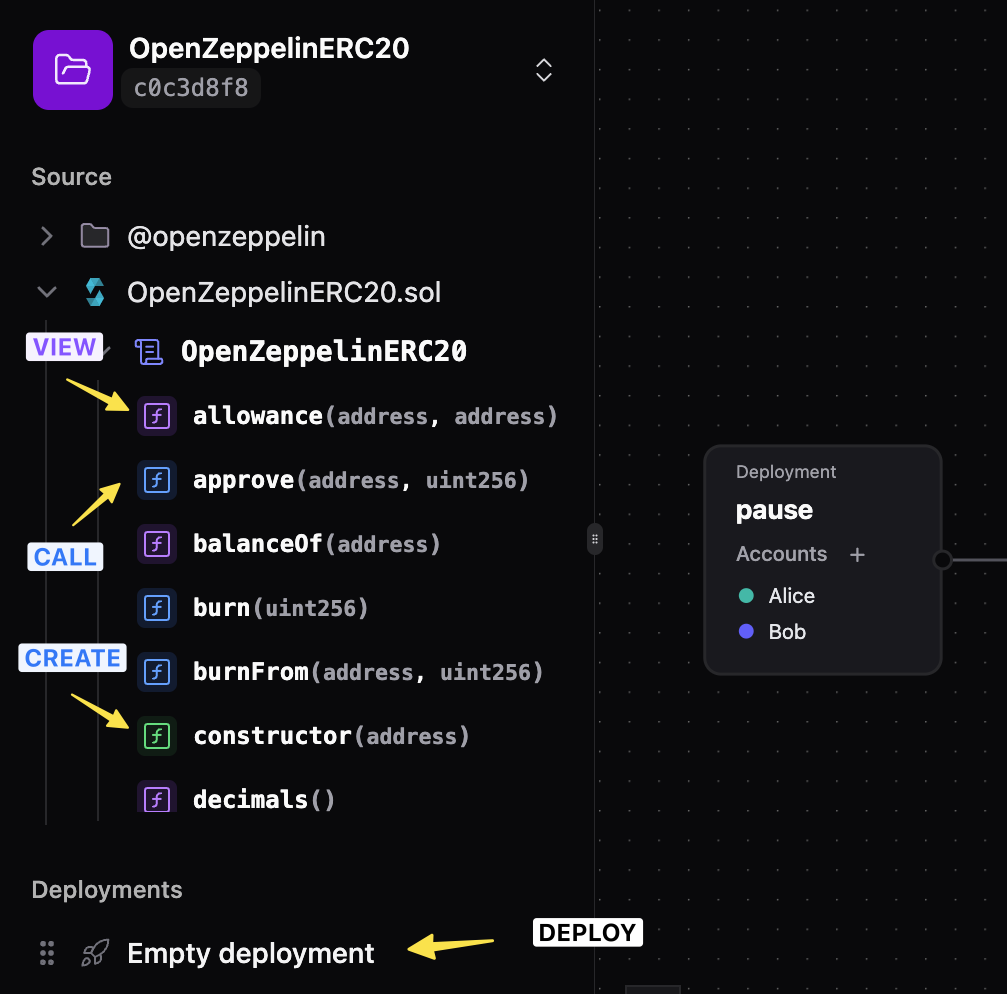
Purple =
Green =
Gray =
My Contract Workbench project we just uploaded.Expand the folder tree to view your code as visual interactive components.Each component represents an externally visible function, with the following identifiers:Blue = CALL - function callPurple =
VIEW - view functionGreen =
CREATE - constructorGray =
DEPLOY - deployment script
Design a test scenario
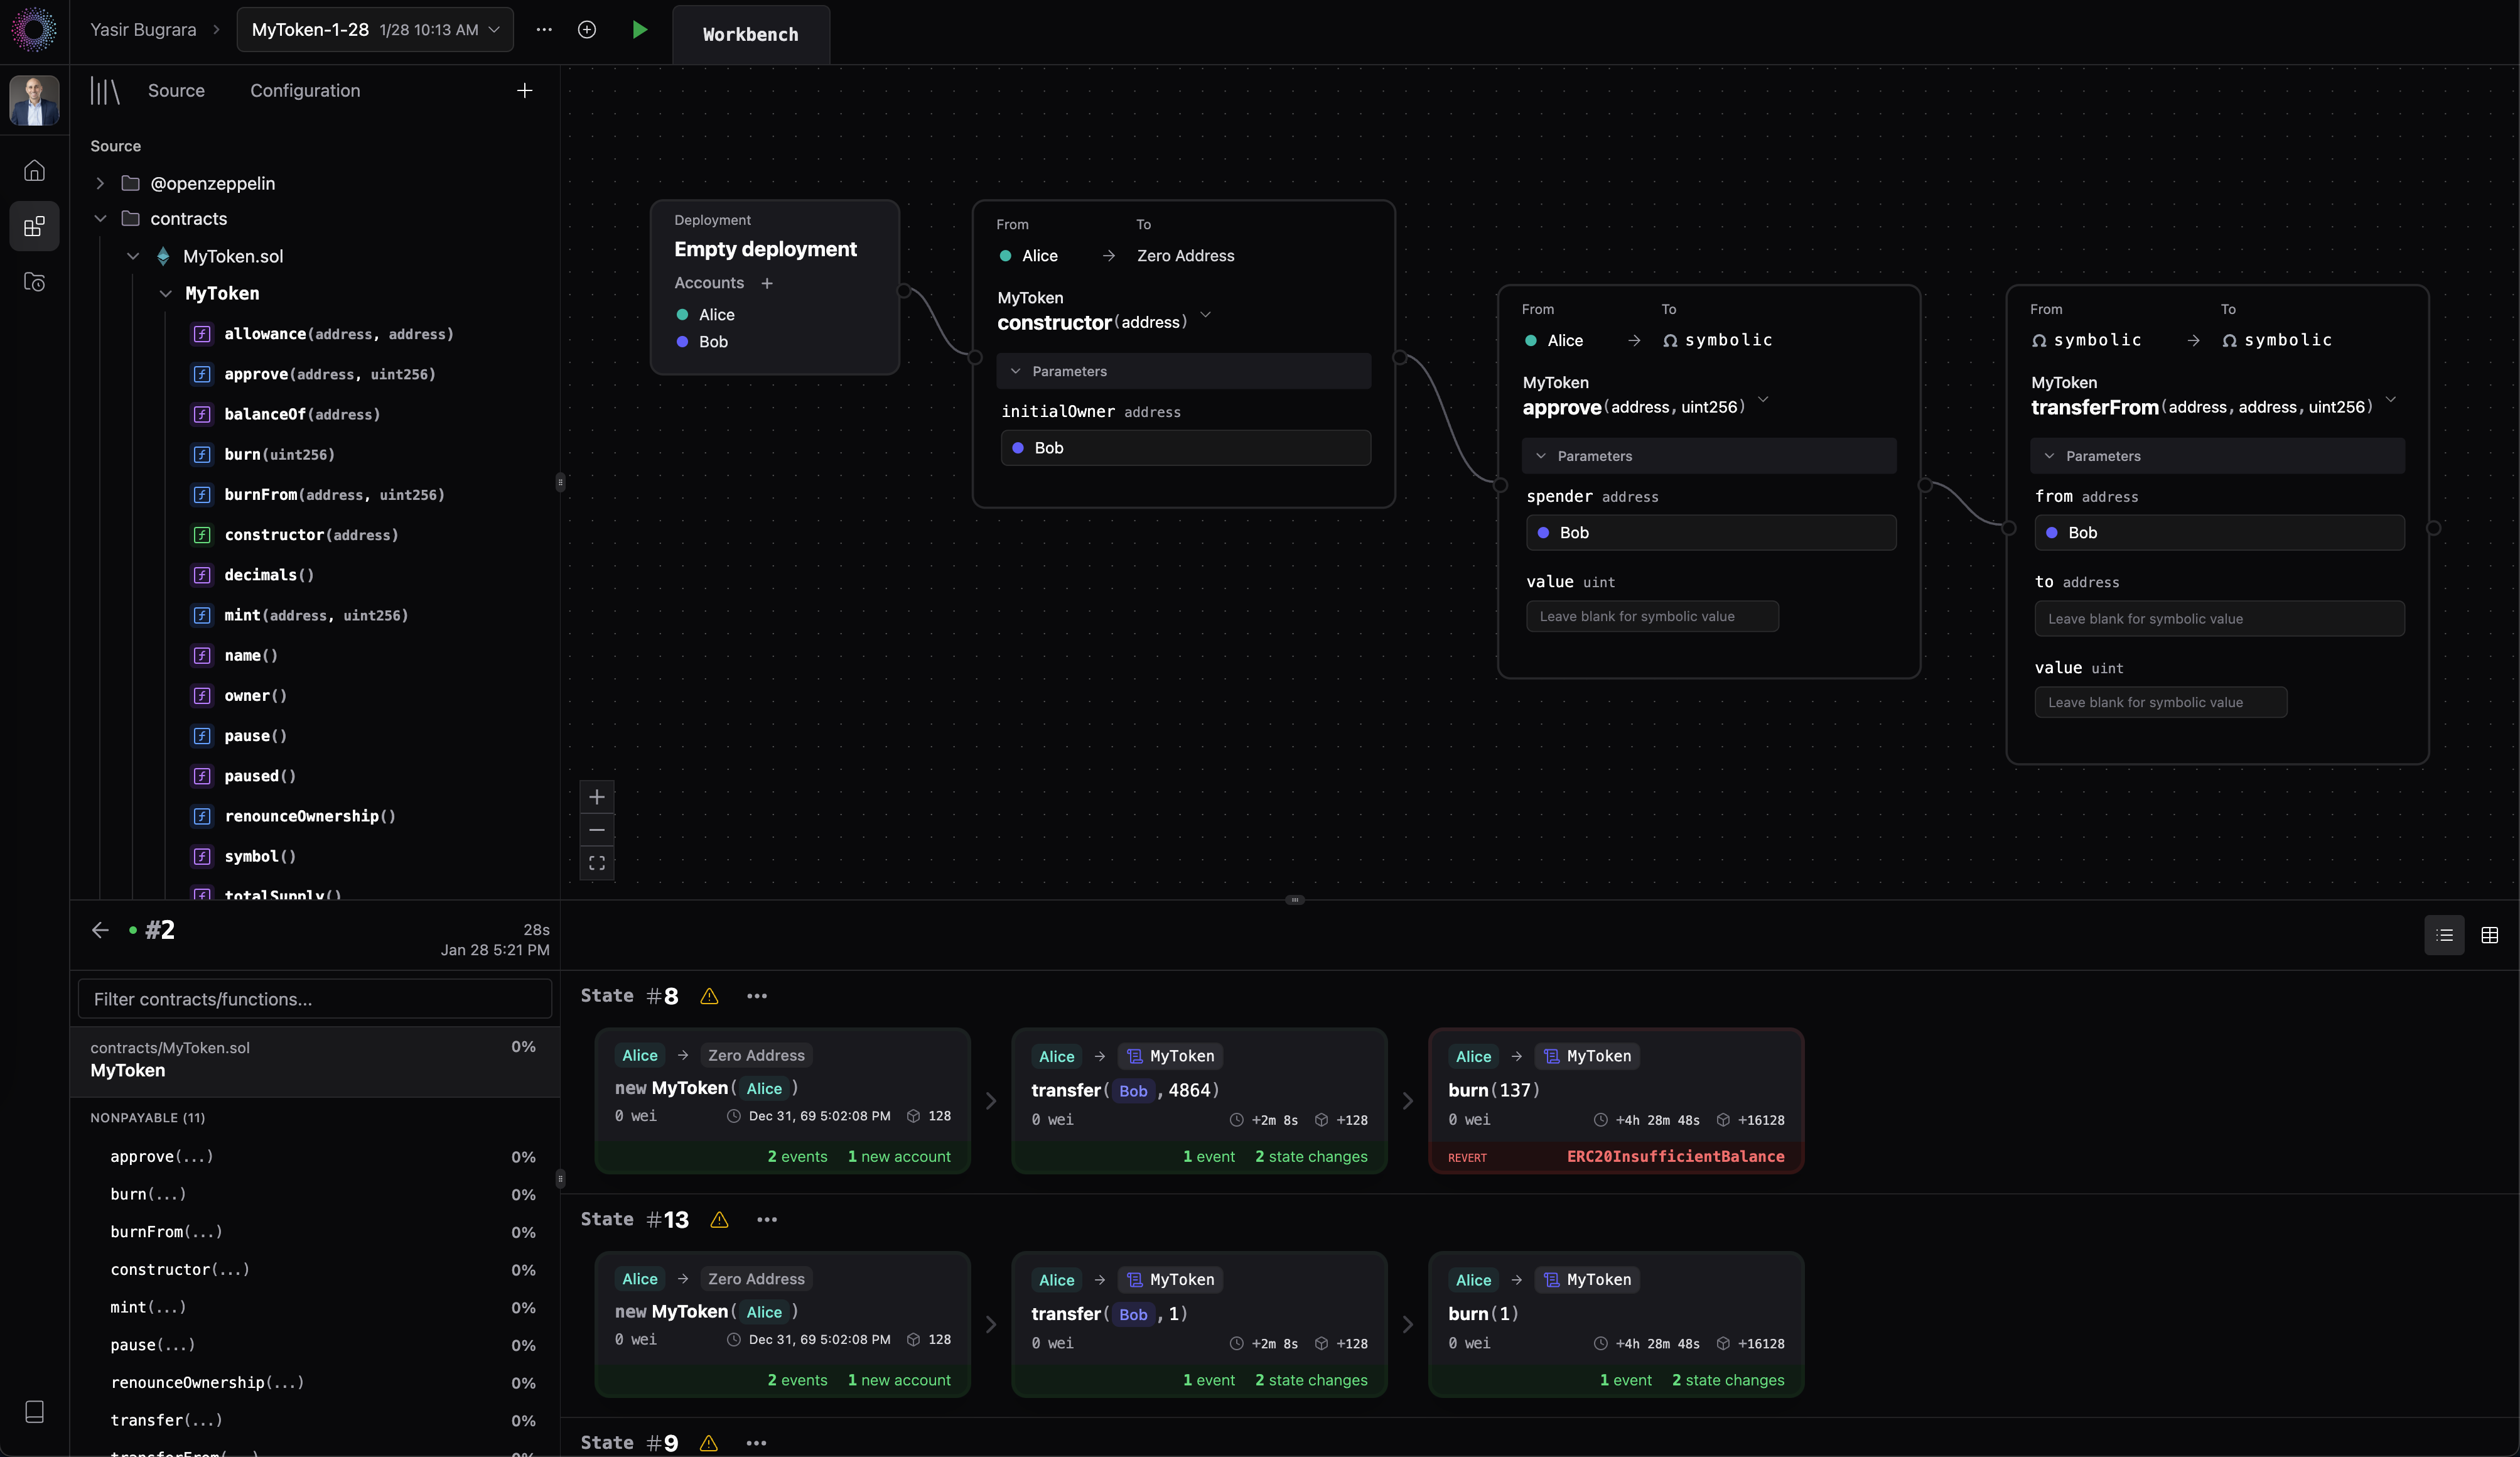
Build an end-to-end test scenario for the 

transferFrom(...) flow using the following sequence of transactions:Deployment → constructor(...) → approve(...) → transferFrom(...)Configure a basic deployment
Since our project did not use a custom deployment script, we can use the provided deployment template to quickly setup a few EOAs.-
From the bottom of the folder tree, drag an
Empty Deploymentcomponent to the canvas and rename it to “ERC20 Deployment”. -
Reduce the EOA count to two (2) by deleting
Claire(keepingAliceandBob). You can add more EOA accounts by selecting the+icon from inside the node.
To leverage custom deployment scripts as part of your testing flow, see the CLI reference or contact us for help.
Construct the transaction sequence
- Drag the
constructor,approve, andtransferFromfunction calls onto the canvas and connect them in sequence, mimicing the end-to-end user flow.

Configure symbolic parameters
Transaction and function call parameters can be set to behave as symbolic values or concrete inputs.When set to symbolic, State Space will automatically calculate the possible unique input values that will lead to an undiscovered path.Learn more about how structured dynamic inputs are generated.- Update the parameters so that:
Alicedeploys the contractAliceapprovesBobas the_spenderBobcallstransferFrom(...)

Explore the state space
Select the icon to start.Discovered execution paths will appear dynamically during execution. Overall coverage metrics will be displayed once the state space exploration is completed.Contact us if you experience any issues.Upon completion, you should see a total 39 test cases (execution paths) with a 37% health score.For a more in-depth coverage analysis, open the coverage view in a new tab by selecting the run number under “Run History”. Select your contract on the left navigation menu and view the covered lines under the
Health scores are a function of line, branch, and functional coverage metrics.
source tab.Feel free to experiement with different parameter settings and sequences to analyze behavior and maximize coverage.Analyze and validate results
Scroll through and locate the test case where:

BobapprovesAiceto spend an allowance ofuint MAXtokens, ANDAlicesuccessfully transfers 1 token fromBob'saccount.

umax spending allowance:
Analyze the state behavior:
- From the results, click a function call in the transaction sequence to analyze contract values, state changes, balances, and emitted events.
- Review all state values and changes for correctness.
- Green highlighted text indicates new state value
- Red → Green format indicates a state change (prior → new state)
Validate states
- Mark states as “Valid” by clicking through the shield icon:
- Green shield: Valid state
- Red shield: Invalid state
- Grey shield: Not reviewed
- Each validation is tracked in the
Historytab. - Multiple reviewers with can collaborate validating state values.


